Unity Unit Testing Basics Tutorial (C#, NUnit)
Unit Tests are a way to be more sure of the changes you are making, a way to reduce the number of defects, catch errors as soon as possible and Unity provides Unit Testing support out of the box.
For a long time is was named Test Runner, but starting with Unity 2019.2 it is a separate package and has a new name – “Unity Test Framework”.
It is still based on NUnit, nothing drastic has changed yet, but it is now provided as a package, that is added by default to new projects. This should not change how you use it but will allow Unity developers to provide new updates to the UTF itself, without the need to update Unity as a whole.
Why Write Unit Tests
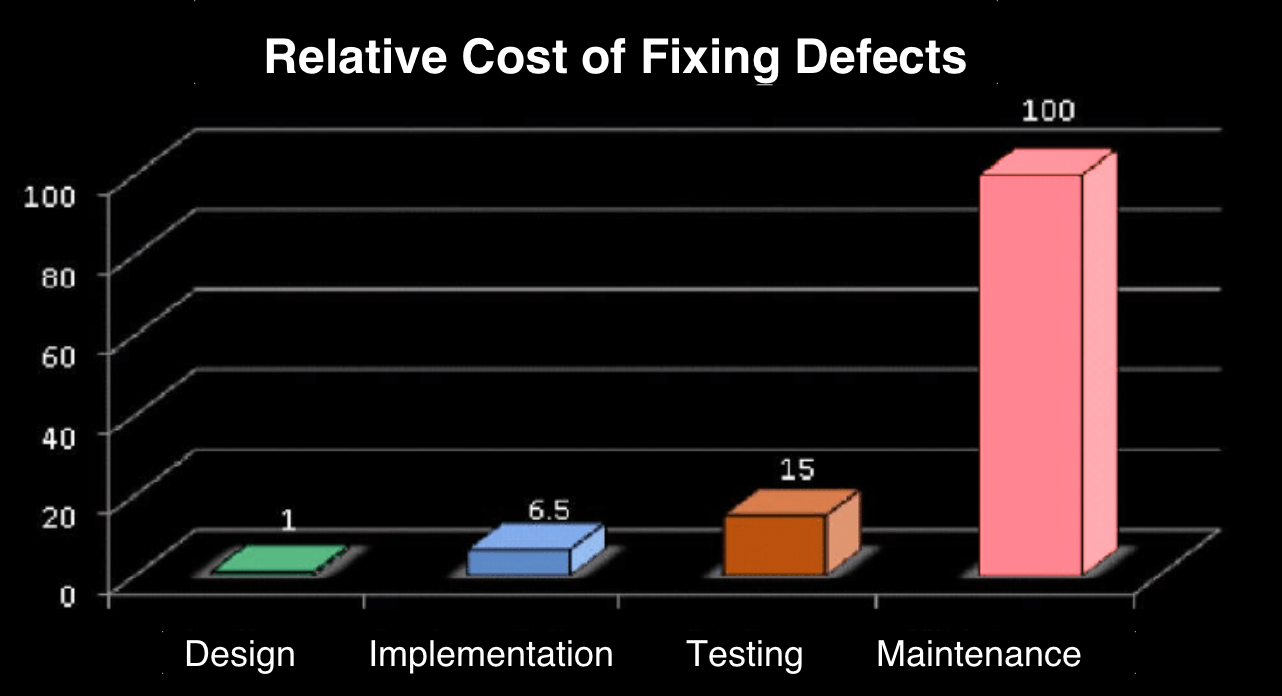
Unit Testing can reduce the defect rate.
Plus, the sooner you catch the bug, the cheaper it is.
If it got out to production, it already may have caused bad user experience, plus it may be hard to pin down based on just user helpdesk tickets.
If the bug was noticed in the development branch, it is not obvious which exact feature caused it, and where to look.
But if you just made the change and see the test broke, you still probably hold a lot of relative info or may even know a few lines of code you just changed that lead to it.
When adding new functionality it can be really handy to be able to test it without leaving the IDE. And because you probably somehow test your new code anyway, this will leave those test cases for later, when anyone comes to change this code, and avoid regression.
If the code already has unit-tests that check if the class behaves as expected, you can change the internal implementation with immediate feedback.
They improve the debugging cycle. If you have a reproduction case in code that you can rerun in less than a second after you add logs or introduce changes, instead of waiting for the game to load or even going into a particular screen to reproduce it – you can make a lot more iterations in the same amount of time.
How to write Unit Tests in Unity
Creating the Tests folder
Before creating your first test scripts, we need a place to put them.
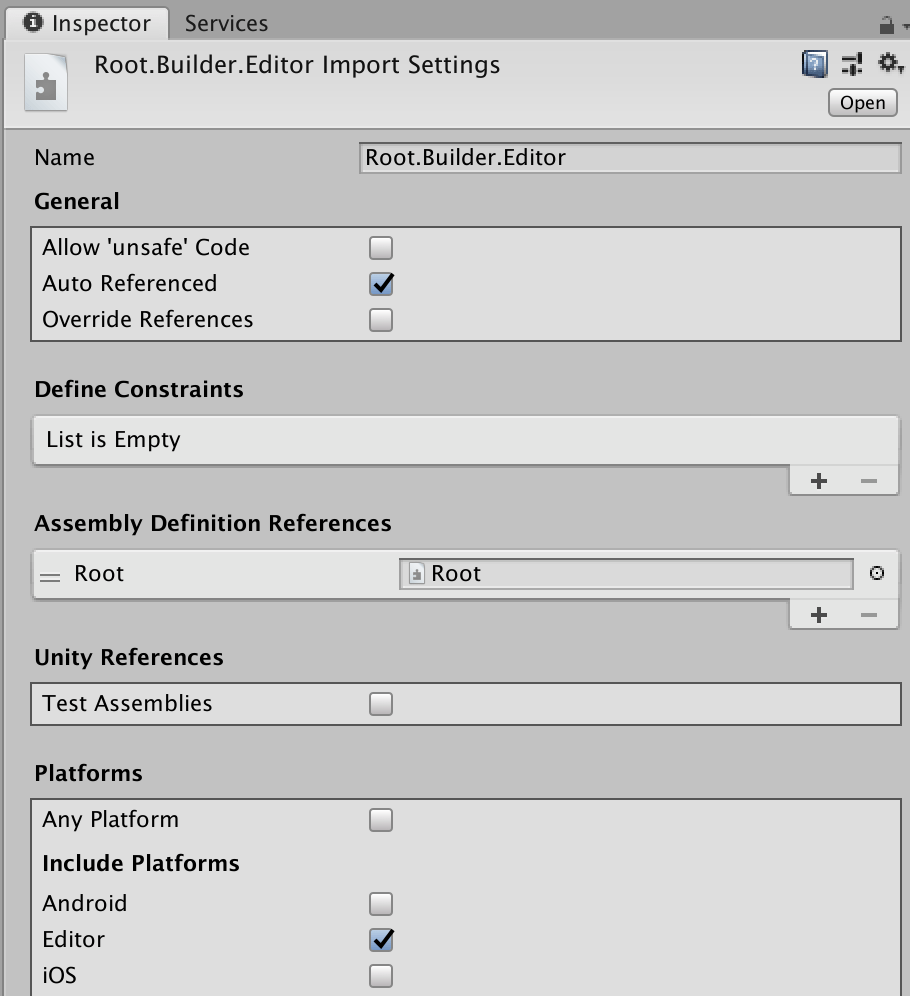
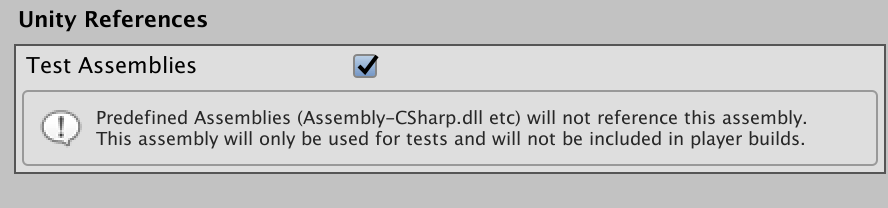
Сreate a folder called Tests near the code you are testing & create an Assembly Definition with “Test Assemblies” checkbox enabled in the Inspector (and ‘Editor’ as the only platform).
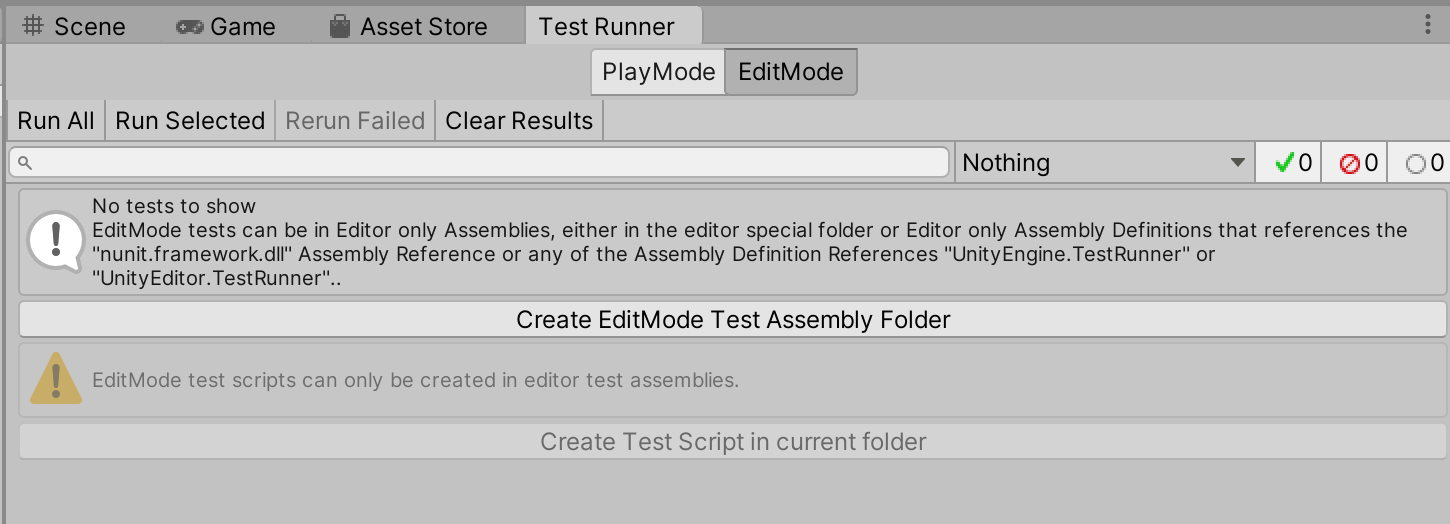
You can create a correctly configured assembly by going to the EditorMode tests on the Unit Tests windows, that are opened in Window -> General -> Test Runner
After you have your assembly ready – you will also need to reference the assembly containing the code you would like to test (creating a new one, if none exist).
It is better to place tests near the code they are testing and not in one big ‘Tests’ folder that tests everything. This will be helpful in case you decide to move or share this part of the code, maybe when starting to use Unity Package Manager.
Creating Test Scripts
You can just right-click inside the Tests folder and create a new C# script. The classes don’t need to be MonoBehaviours, just plain C# classes that do not inherit from anything will work.
You can also open the Test Runner window, and create a script from there, this will create a file with correct usings and with a couple of example methods. But this button only seems to appear when you don’t have any tests yet.
You can name the file (and the class) by using the name of the class or the feature you want to test and adding “Tests” at the end. (Sometimes “Fixture” is used instead).
For example, if you are testing a RandomGenerator class, it will be named RandomGeneratorTests.
Naming Methods
There are common naming conventions I cover in the other article, but for your first unit tests just pick something simple, like “Test” + ”MethodYouTest()”.
Attributes
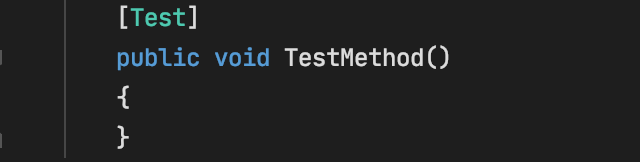
[Test]
To allow the NUnit framework to find your methods and call them when you want to run tests, you will need to mark them as a test.
To mark your methods you will need to add C# attributes, specifically the [Test] attribute.
Just add [Test] above the method, so it would look like this:
But to use it you will need to first add using NUnit.Framework; at the top of the script.
[SetUp] & [TearDown]
Other often-used attributes are [SetUp] and [TearDown]. Methods marked with them will be called for each [Test] method. [SetUp] methods are called before the test method itself, and [TearDown] is called after.
When you create a test class, you can think of [SetUp] as your constructor, where you prepare things that will be usefull for all [Test] methods in this class. And think of [TearDown] as an IDisposable (or a destructor), to clean up after the test method.
These attributes help avoid writing the same things in the begginging and at the end of each test method. Writing tests you should still follow the general principles, like avoiding duplicate code, which these attributes allow us to accomplish.
I also go over other more specific (but still useful) attributes in another article.
Assert Class
Assert class is the API from NUnit that allows you to check if expectations meet reality.
The most versatile is Assert.That(condition, message);
The first argument is the condition you are testing, so just put there anything that returns a bool, or a bool variable itself.
The second is the message that will be displayed when the test fails. The message is optional, but it will be useful if the test fails.
1[Test]
2public void TestMethod()
3{
4	int numberOne = 1;
5	int numberTwo = 1;
6
7	Assert.That(numberOne == numberTwo, "numbers are not equal");
8}
But there are other ways to make your assertions self-documenting, without any need for messages.
How to run
First, open the Test Runner window in the Unity Editor under Window -> General -> Test Runner.
And then either just pressing “Run All” to run all found tests, or right-clicking the specific test or class to only run selected, which can be especially useful when debugging some failing test.

EditMode vs PlayMode Tests
There are two types of tests Unity allows us to write. First are EditMode tests, the ones you would expect when talking about Unit Testing, the ones that can work without any Unity functionality, just testing your own custom code.
The PlayMode Tests enter play mode to run. With them you can use MonoBehaviours, can write tests using Coroutines, can test things that depend on time passing, without using mocks.
The default choice should probably be EditMode tests, maybe using mocks, but it may be very useful to test some code that depends on Unity behavior without overcomplicating it with abstractions.
There is a special attribute you would use for PlayMode tests:[UnityTest]
This allows you to run as coroutines, waiting frames, or anything you could do when actually running the game.
1[UnityTest]
2public IEnumerator PlayModeTestMethod()
3{
4	// do something
5	yield return null; // wait a frame
6	// assert the results
7}
Putting it all together
So the overall process to create and run your first unit test looks like this:
- Create a Tests folder
- Create an .asmdef (with “Test Assemblies” enabled)
- Create a test class in that folder
- Create your test method marked with a [Test] attribute
- Alt+Tab back to Unity & wait for the code to compile
- Hit ‘Run All’ in the Test Runner window
But there is more to Unity Unit Tests which I cover in a separate article, things like IDE support to speed up your test running, “Arrange, Act, Assert” pattern to structure your test code, running tests from the console and hooking it up with Continuous Integration, plus more.
Useful Links
Check out more Unity Tutorials